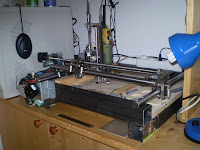
 Small CNC mills and routers can be a bless for the dedicated tinkerer, but they're expensive, to say the least. No wonder there have been lots of efforts in home-built ones.
Anyway, this is how my dad and i built ours. It's mainly used to isolation route, drill and cut out single- and double-sided circuit boards, but also for engraving signs and milling small aluminium parts.
First, i will show you how to connect unipolar stepper motors to your computer and set up the necessary software.
Setting up EMC2
Many DIY and commercal mills use EMC, the enhanced machine controller. It's free, linux based and as flexible as it could ever be.
The very best way to get and set up EMC2 is to use the Ubuntu EMC2 Live CD. You can try to install it yourself (did that with 6.10), but i tell you, it's a pain.
When you run EMC2 for the first time, you will be asked to choose a configuration. You can pick either stepper_mm or stepper_inch and tell EMC to copy it to your home directory for customization. Download this archive and choose one of the supplied setups (you can switch between them at any time):
2.5D (2 unipolar stepper motors, servo for Z)
3D (3 unipolar stepper motors)
Each setup comes with two .hal-Files. Overwrite the original files of your configuration with these and you're done.
Building a simple Stepper Driver
The next thing you will need are two unipolar stepper motors with up to 250mA current/phase. I bought mine from Pollin (Howard Industries 1-19-4200), but you might as well salvage ones from old printers.
To drive them, i recommend using the circuit displayed below - it's dirt cheap and really simple, but still sufficient for now. Connect the stepper's common wires to Pin 1 and 2 of the respective connector and the others to the rest. It will propably take you a few tries to find out the correct order.
Hints:
- Use an ohmmeter to identify the steppers common wires and corresponding coil ends.
- You can change the pinout in the configuration's standard_pinout.hal.
- Old printer's axes can be used as a great testing machine.
- Use an old computer power supply to power the driver.
- For now, it doesn't matter which HAL files you have chosen.

You should be able to make 2 steppers run now. If you've got problems, just ask.
There may be quite a few posts on this topic in the next weeks, mainly concerning a few details of the mechanical construction, but probably only on request.
UPDATE: Ok, I won't write anything about the mechanical part. Most of the good stuff is already documented elsewhere anyway, e.g. the linear bearings are similar to those.


Can I please get a black and white version of your diagram. I'm old and my eyes aren't what they used to be. I can barely see your diagram. Thank You
ReplyDeleteGreat project.
ReplyDeleteThank you for that information.